OPNsense keeps a firewall’s whole configuration in one file, and every firewall can export it. Across a fleet, that’s one export, one schedule and one place to check per box, and the copy you need most is the one that sat on the firewall that just failed.
This guide sends that file somewhere else: each firewall encrypts its configuration with a key you set, and NetDefense puts it in an S3-compatible bucket you own, on a schedule, with every firewall’s last result on one page.
TL;DR
- Create a bucket and an access key that can write to it.
- Give NetDefense the bucket, a named schedule and an encryption key, test the connection, and turn the configuration on.
- Turn backups on for each firewall, run one now, and read each firewall’s last backup on the Backups page.
- The files are yours to read with openssl. NetDefense doesn’t restore, compare or keep a history of them.
How a backup travels
When a backup runs, NetDefense sends the firewall’s agent a backup task carrying the encryption key. The agent encrypts the configuration on the firewall with AES-256, in the same format OPNsense uses for its own encrypted backups, and sends it back to NetDefense, which uploads it to your bucket. Each run writes a new file, named for the firewall and the time: opnsense/config-br-east-albany-20261105T080000Z.xml.
NetDefense holds the key, so it can send it with every backup task, but it never shows it back: neither the web console nor the API returns it once it’s saved. The encryption protects the file in your bucket. It isn’t a secret from NetDefense.
Step 1: A bucket and a key that can write to it
Create a bucket with your storage provider, any that offers an S3-compatible API. It has to be reachable from the internet: NetDefense uploads the file, not the firewall, and it refuses an endpoint that points to a private, loopback or reserved address, both when you save and when you test. Then create an access key for NetDefense that can only reach that bucket:
- Uploads need permission to write objects:
s3:PutObject. - Test Connection, in step 3, checks that the bucket exists with a
HeadBucketrequest, which AWS allows withs3:ListBucket.
NetDefense never deletes or overwrites a backup, so the key needs nothing else. How long the files stay is up to the bucket’s own lifecycle rules.
Step 2: Pick a schedule
Backups run on a named schedule, the same kind that drives recurring syncs and commands. Open Schedules, click New schedule, and give it a name, a cron expression and a timezone, such as nightly-backups, 0 2 * * * and America/Chicago. Click Create schedule.
Step 3: Point NetDefense at the bucket
Open Backups and fill in the S3 Backup Configuration card:
- S3 Endpoint, S3 Bucket, Access Key ID and Secret Access Key, from step 1.
- S3 Folder/Prefix, optional, such as
opnsense, to keep the files in one folder of the bucket. - Backup cadence: under Pick a schedule…, choose
nightly-backups. It’s attached when you save. - Encryption Key and Confirm Encryption Key. Don’t leave the key empty: a firewall with no key isn’t backed up.
Click Create Configuration, then Test Connection. A failed test names the cause, such as rejected credentials, a missing bucket or an endpoint that doesn’t answer.
A new configuration starts out disabled. Turn it on with the switch at the top of the card, and the card reads Scheduled.
Keep your own copy of the key
The console says it plainly: “This key cannot be retrieved once saved. Store it securely - backups cannot be restored without it.” Put the key in your password manager before you save it.
Step 4: Turn backups on for each firewall
Each firewall is off until you turn it on. In the Device Backup Status table on the same page, switch Enabled on for every firewall you want backed up. A firewall left off is never backed up, schedule or not.
A firewall uses the organization’s key unless it has its own. For one whose backups need a separate key, choose Set custom key… in its Encryption Key menu. The same warning applies: keep a copy.
Step 5: Back up now and check
You don’t have to wait for the first night. On Run, pick the Backup command, choose the firewalls or OUs, and click Run now. Only firewalls with backups enabled are backed up. A firewall that’s offline doesn’t take the backup later: its task expires after about a minute.
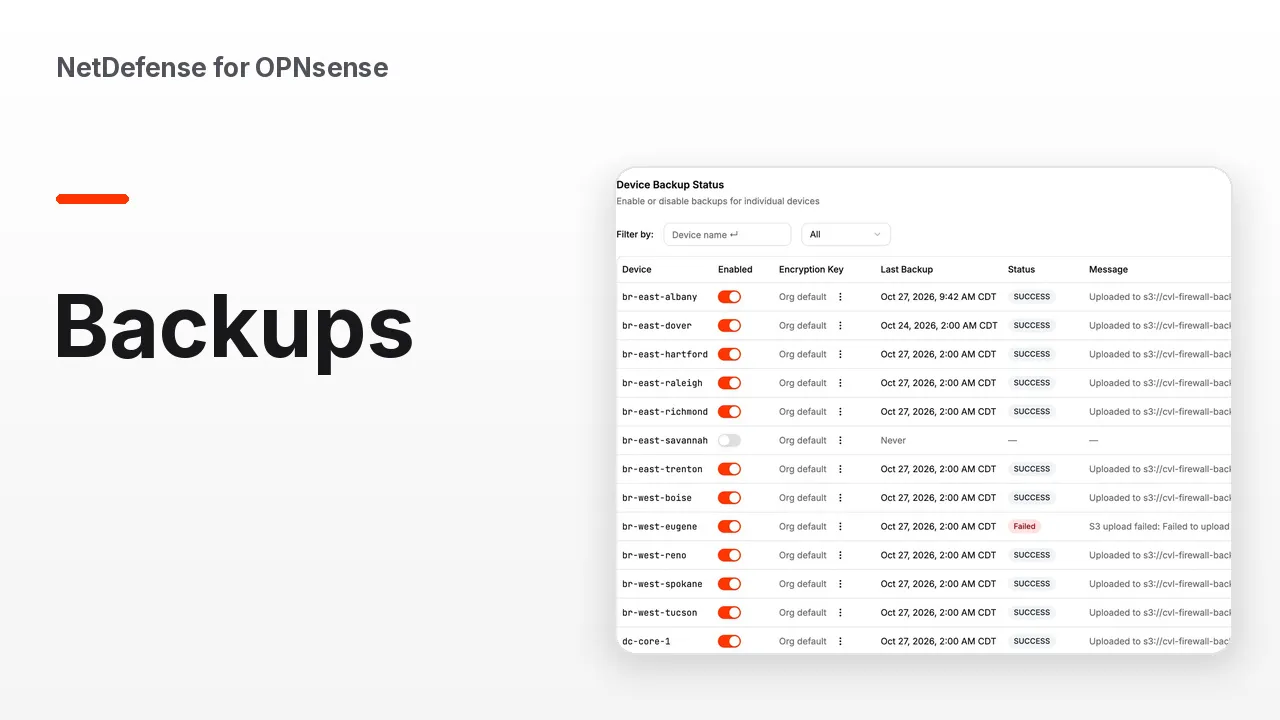
Back on Backups, each firewall’s row shows its Last Backup, its Status and the Message it ended with: where the file went, or why it failed. Each run is also a BACKUP task on the Tasks page.
Reading a backup without NetDefense
A backup file is the firewall’s config.xml, encrypted. To read one, download it from the bucket and decrypt it with openssl, which asks for the key:
The sed drops the header lines and the footer around the encrypted text. What comes out is the firewall’s configuration as plain XML.
What NetDefense doesn’t do
- No restore. NetDefense writes the files. It doesn’t put a configuration back on a firewall.
- No comparing or history in the console. Every run adds a file to your bucket, and the Backups page shows each firewall’s last result only.
- No cleanup. Old files stay until your bucket’s lifecycle rules remove them.
The same thing from the terminal
Every step has an NDCLI equivalent. ndcli backup config set asks for the secret access key and the encryption key, so neither ends up in your shell history: