Onboarding
When you sign in to NDWeb for the first time, you don’t belong to any organization yet. NetDefense is organized around organizations — each one is a separate container for devices, policies, and users — so the dashboard guides you to either join an existing organization or create your own.
The first dashboard
Section titled “The first dashboard”After your first login, the dashboard shows a welcome state with two options:
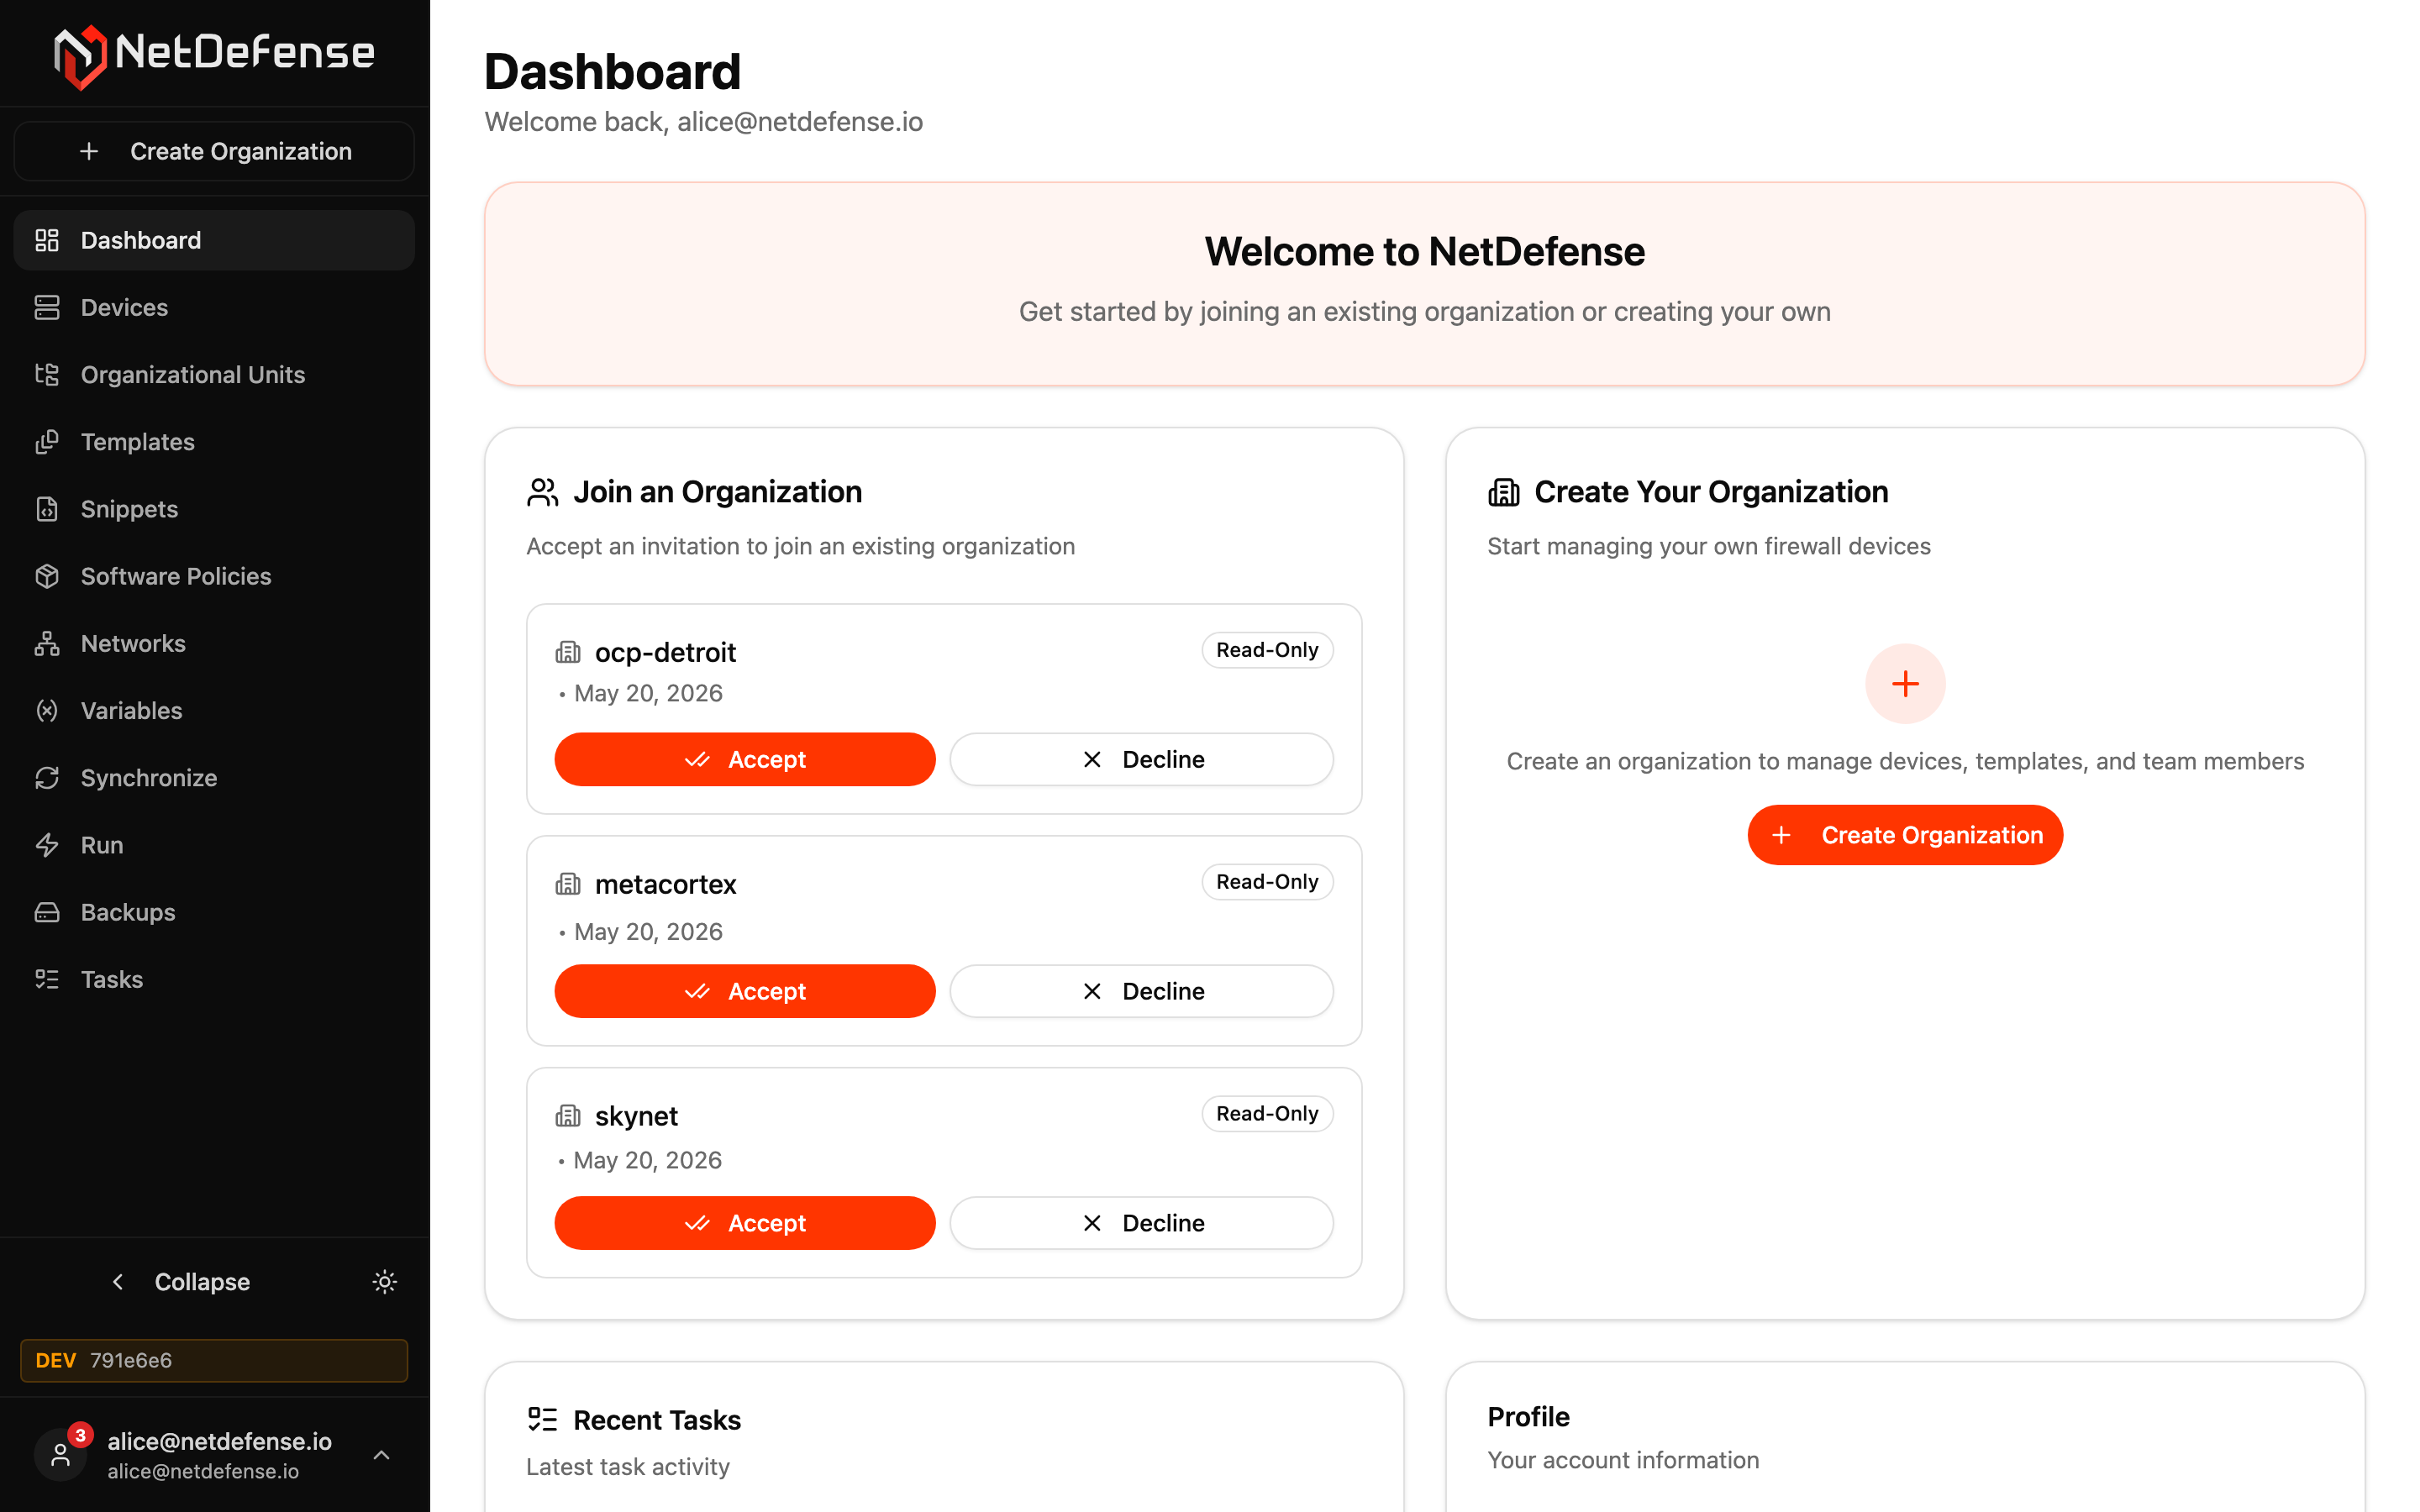
- Join an Organization — lists invitations sent to your email address. Each card shows the organization name, who invited you, the date, and the role you’ll receive when you accept.
- Create Your Organization — starts a new organization that you own. You can do this even if you have pending invitations.
The pending-invitations count is also reflected as a red dot on your avatar at the bottom of the sidebar.
Reviewing all invitations
Section titled “Reviewing all invitations”The Invitations page (sidebar → Invitations, or the bell-style indicator on your avatar) shows the full list of invitations sent to your account, grouped into Received and Sent tabs.
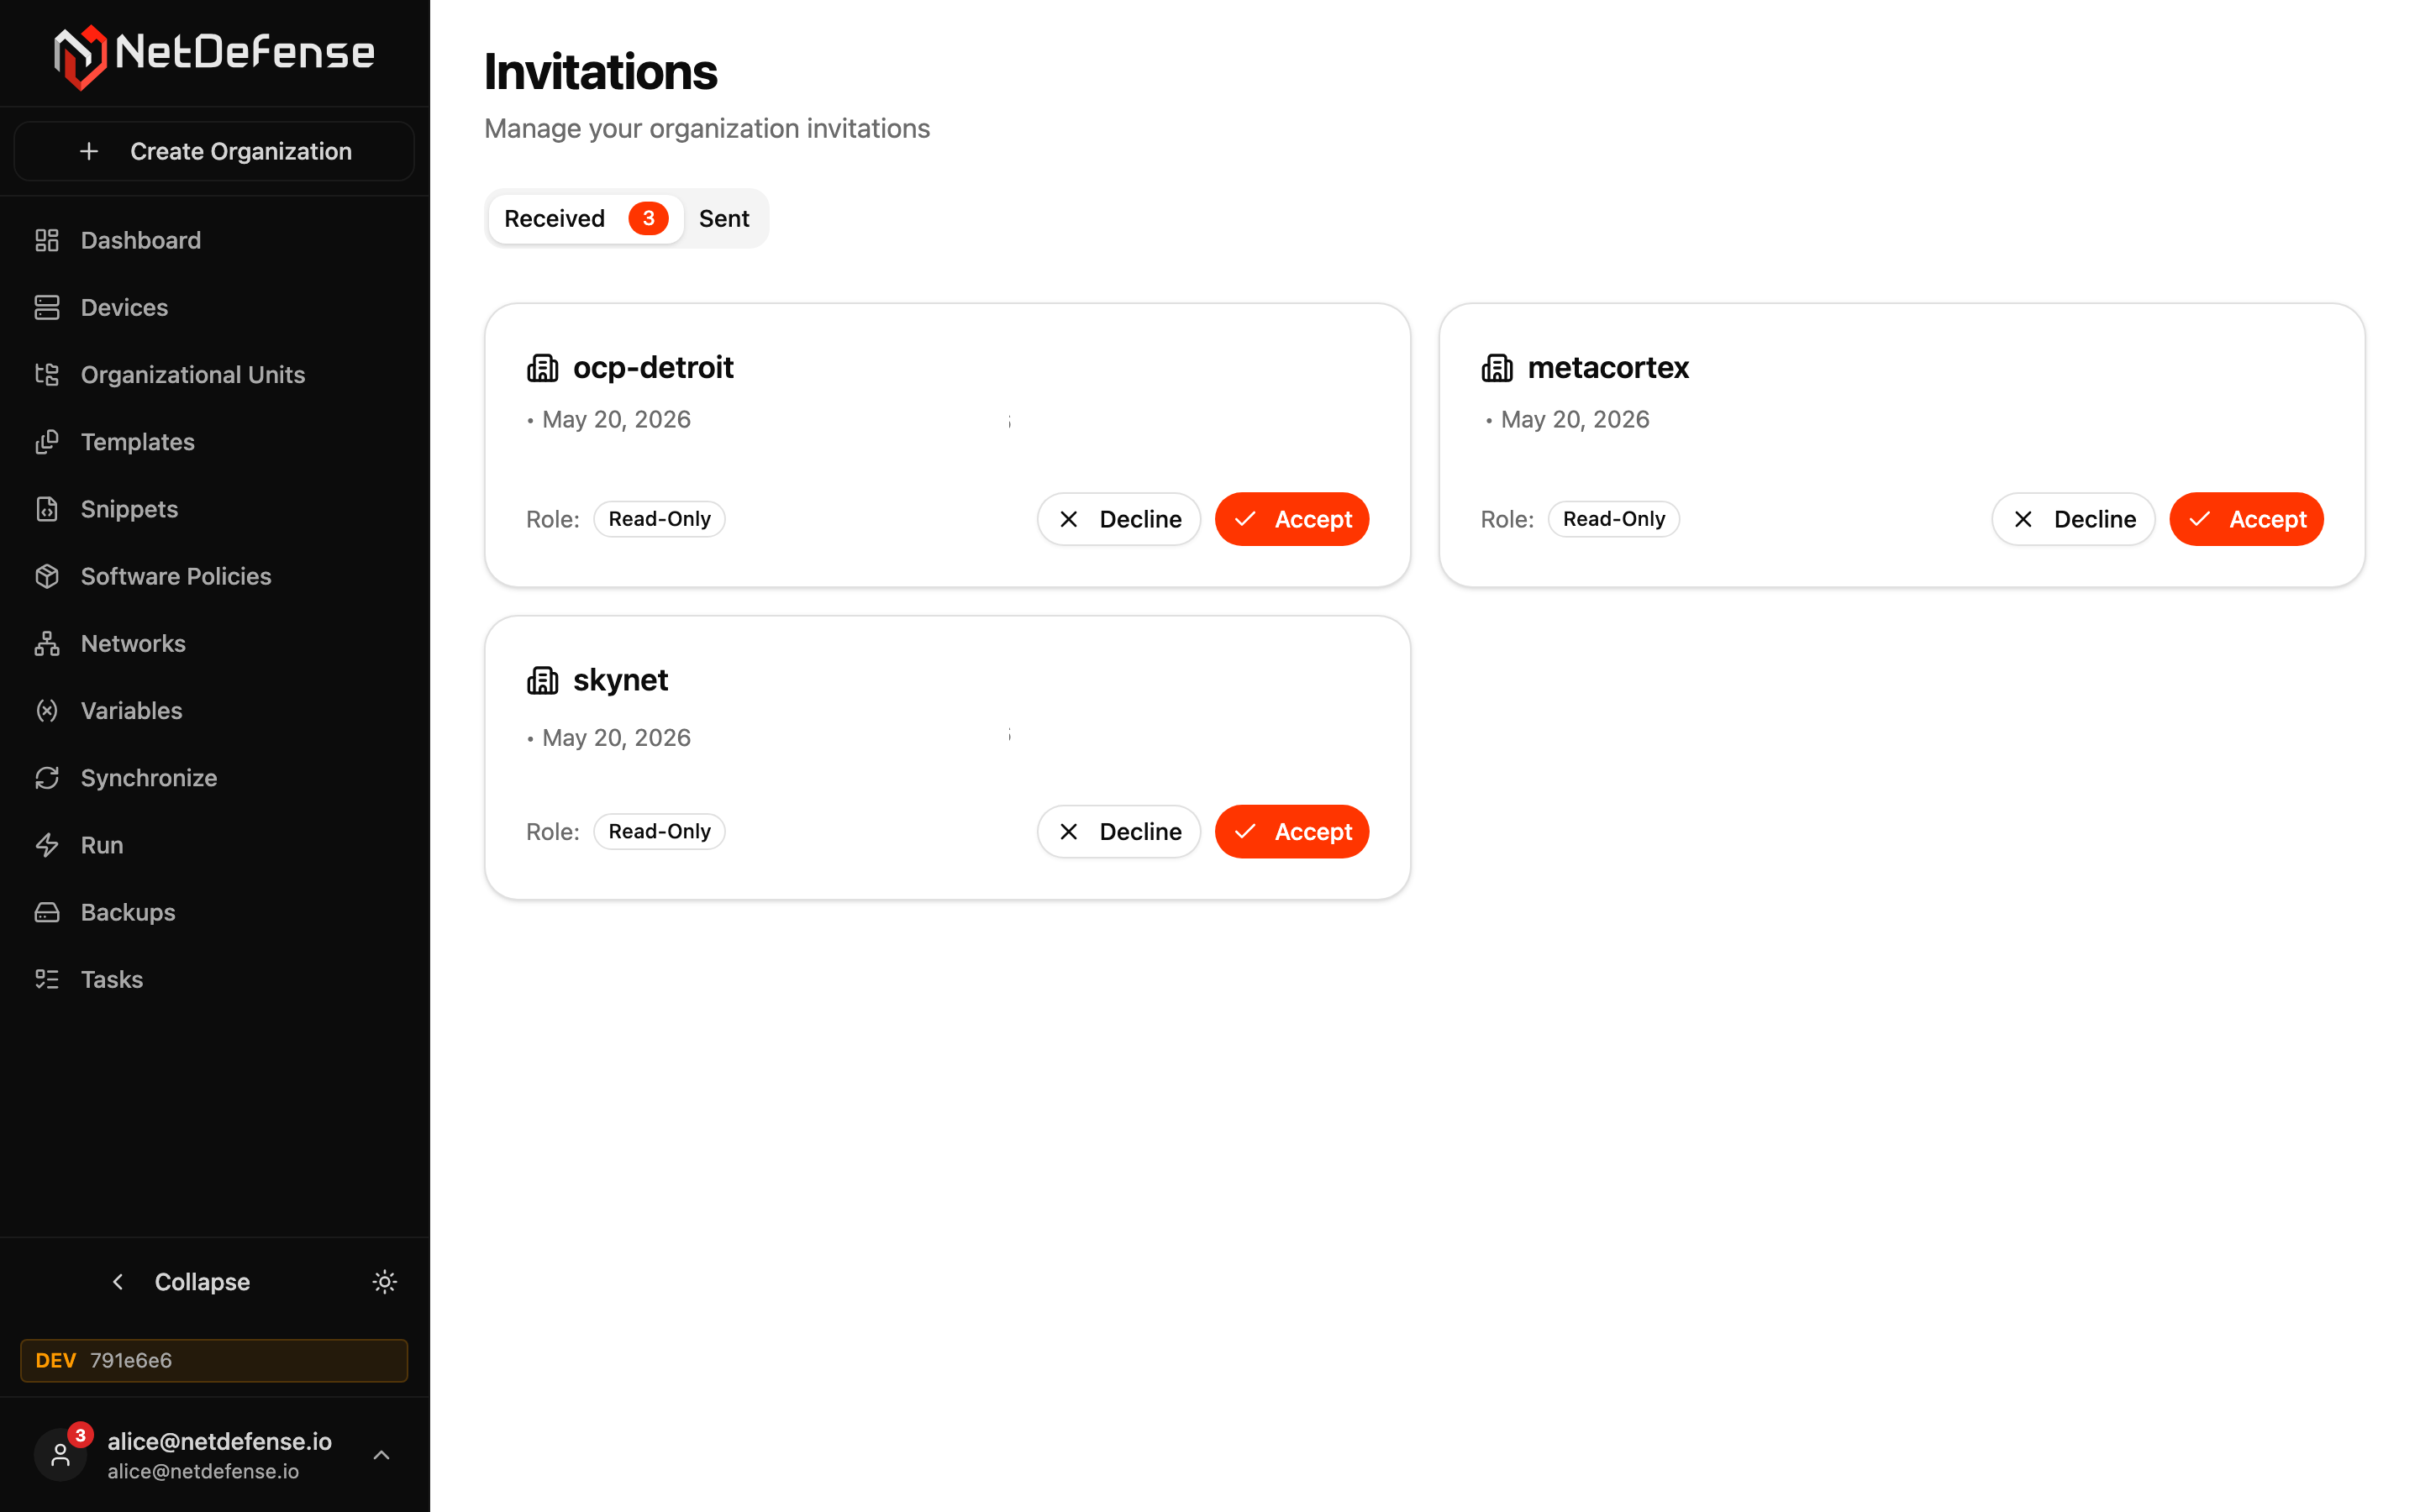
For each received invitation you can:
- Accept — you become a member of that organization with the role shown on the card. The organization immediately appears in your sidebar organization switcher.
- Decline — the invitation is dismissed. The organization admin can re-invite you later if needed.
Invitations don’t expire automatically, but an admin can revoke them at any time from the organization’s Members page.
Roles you might be invited as
Section titled “Roles you might be invited as”| Role | What it can do |
|---|---|
| Read-Only | Browse devices, policies, snippets, templates, tasks, and backups. Cannot apply changes or run actions. |
| Read-Write | Everything Read-Only can do, plus edit policies, run sync actions, schedule tasks, and manage devices. |
| Admin | Everything Read-Write can do, plus invite and remove members, change roles, and manage organization settings. |
The role is decided by whoever sent the invitation. If you need a different role after accepting, ask an admin of that organization to change it on the Members page.
Creating your own organization
Section titled “Creating your own organization”Clicking Create Organization from the dashboard, the sidebar, or the empty Organizations page opens this dialog:
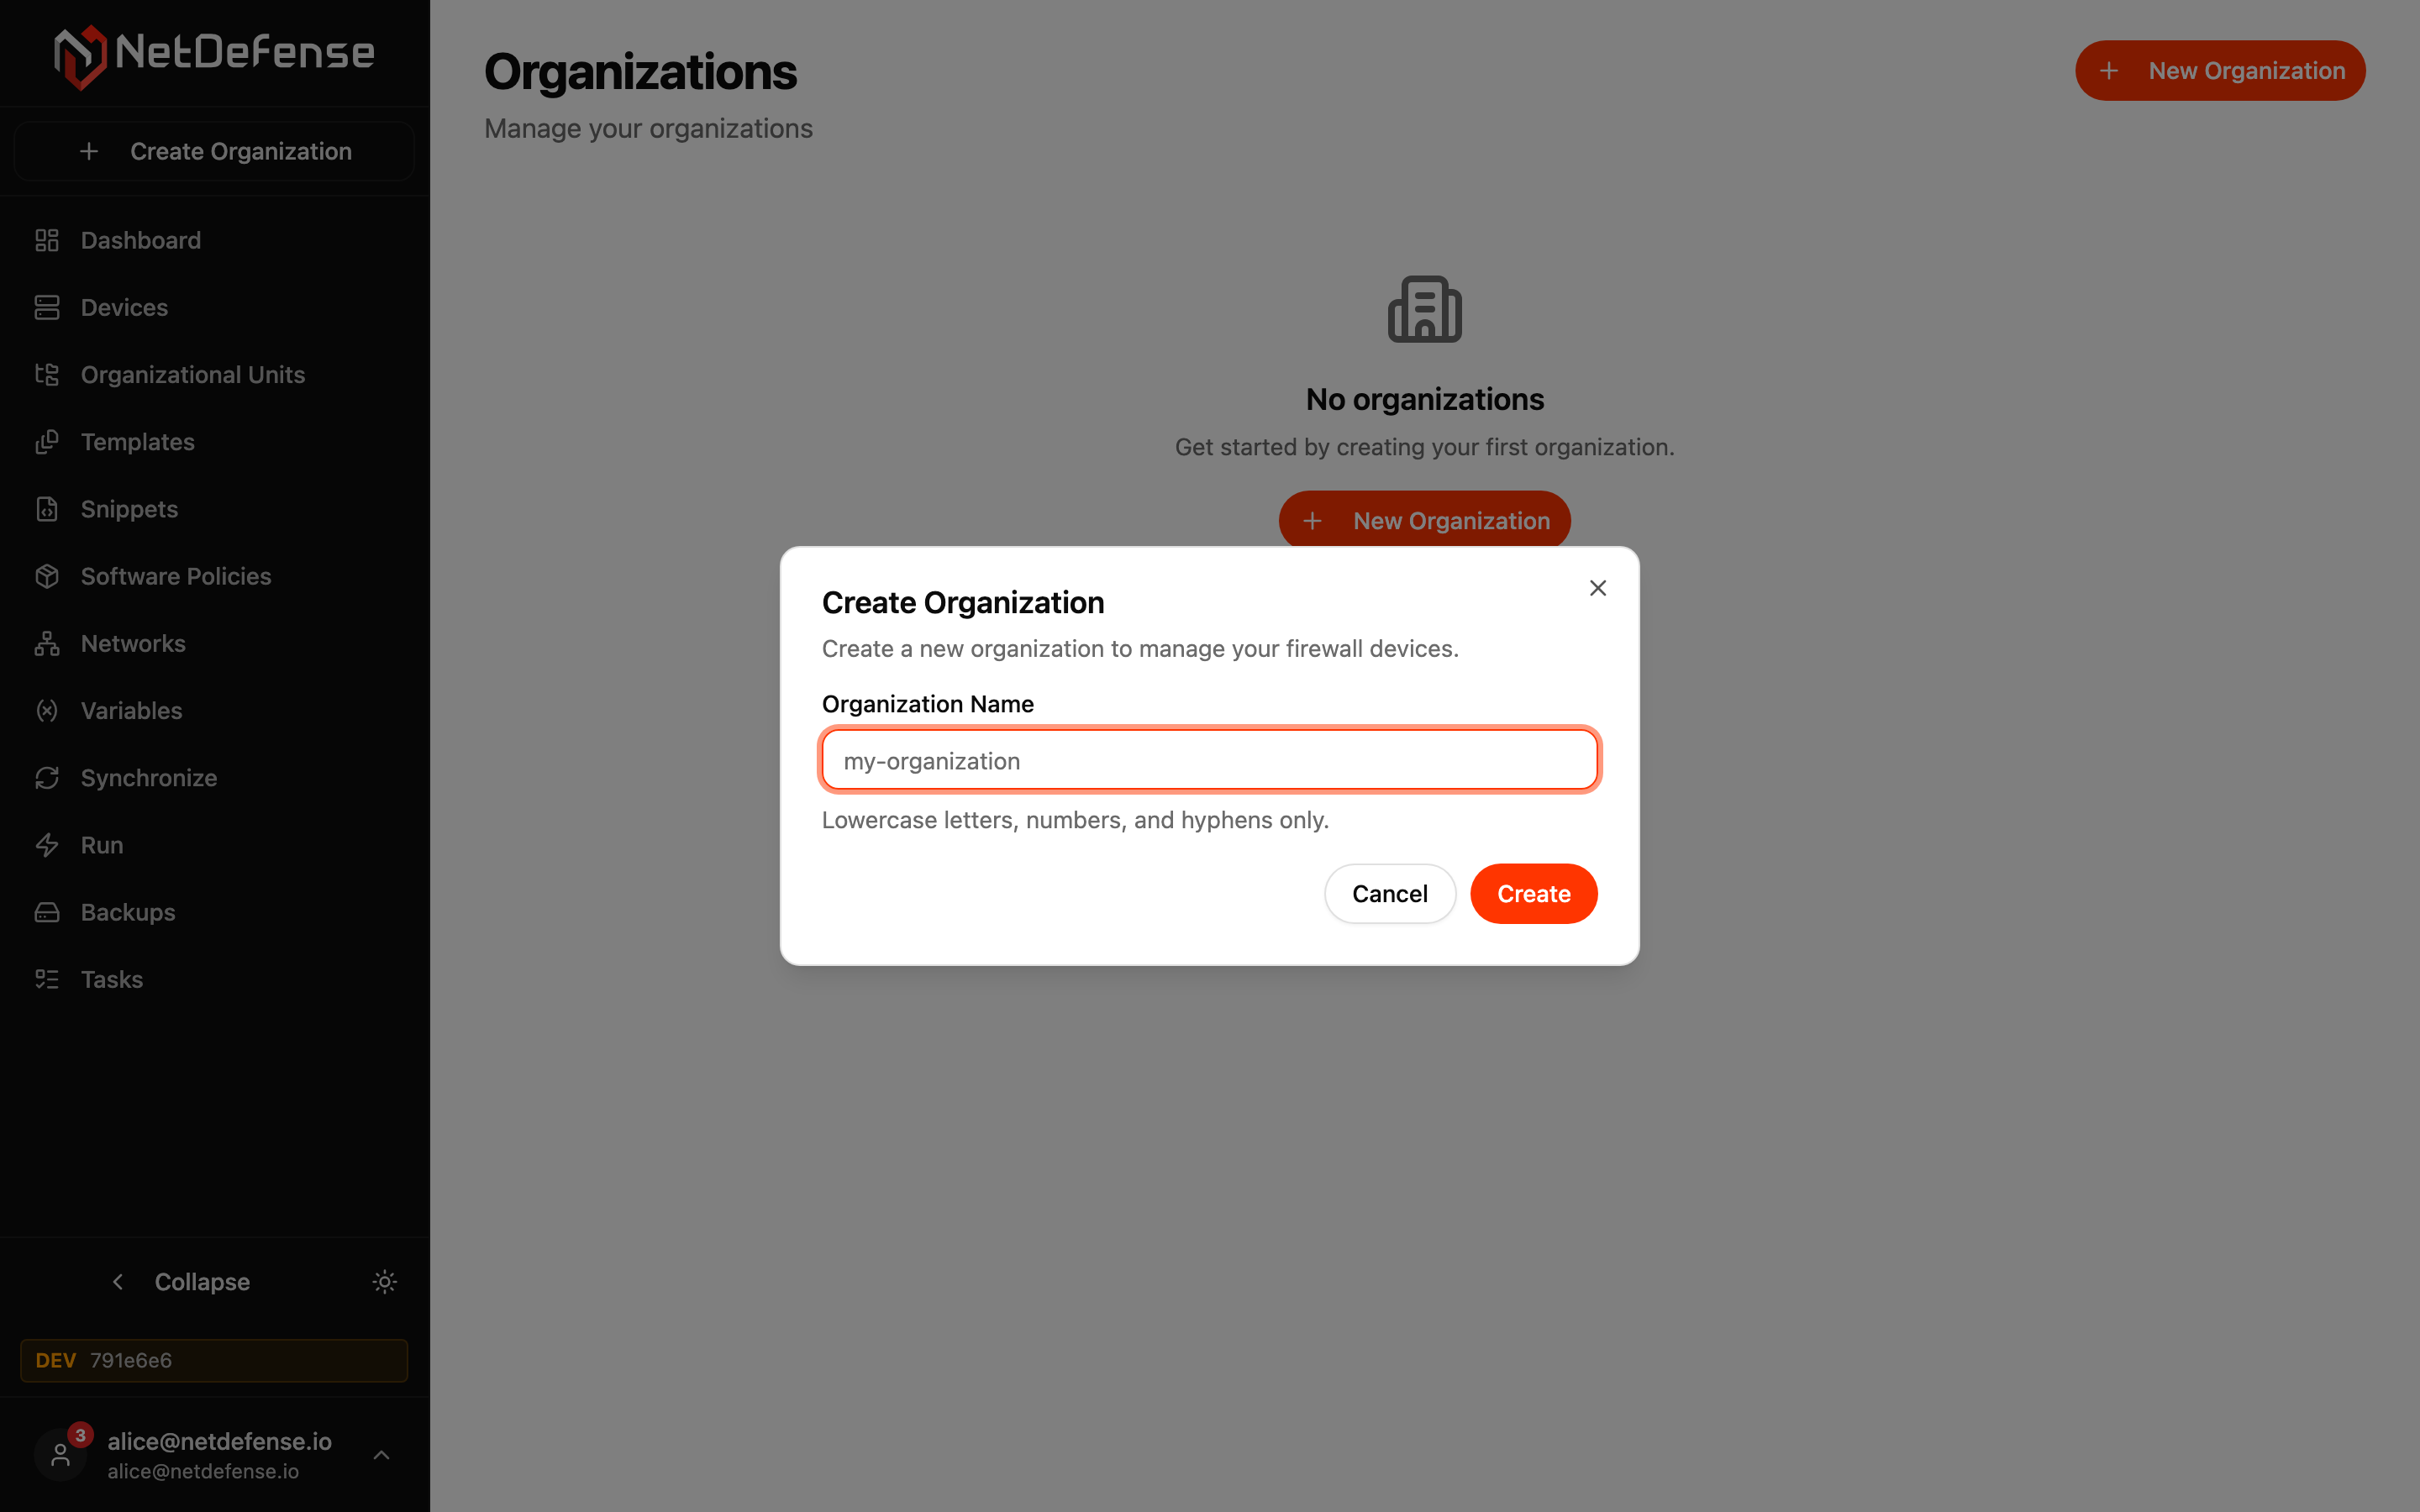
Choose a name that’s short and memorable — it appears in the sidebar switcher and in every URL inside the organization. Allowed characters are lowercase letters, numbers, and hyphens. You can’t change the name after creation, but you can create additional organizations side by side from the same account.
Once you click Create, you become the organization’s first Admin. From there you can enroll a device, invite teammates, and start building policies.
What’s next
Section titled “What’s next”- Accounts & Organizations — full background on the account model, roles, and multi-tenancy.
- Devices — enroll your first OPNsense device into the organization you just joined or created.