Installation
This guide explains how to install the NetDefense plugin on your OPNsense firewall. Choose the installation method that best fits your deployment scenario.
Prerequisites
Section titled “Prerequisites”Before installing the NetDefense plugin, make sure you have:
- OPNsense 25.7 on FreeBSD 14 (amd64)
- Administrative (root) access to the OPNsense device
- Outbound network connectivity to
repo.netdefense.io - A NetDefense account with an available registration token
Installation Methods
Section titled “Installation Methods”Pick the method that matches your scenario:
- Quick Install — One-line
curl … | sh. Sets up the repository and installs the plugin; you finish configuration from the OPNsense web UI. Best for first-time installs and operators who want to inspect settings before going live. - Unattended Install — One-line
curl … | sh -s -- --auto-setup=<token>. Drops the registration token, generates a device UUID, provisions the OPNsense API user/key, and starts the agent. Only NetDefense-side device approval remains manual. Best for SSH automation, IaC pipelines, fleet rollouts. - Manual Repository — Each step run individually: install fingerprint, write repo config,
pkg update,pkg install. Best when you want to audit every step. - Offline Package — Download the
.pkgonce, transfer to an air-gapped OPNsense,pkg add. No automatic updates afterwards.
One-Line Installation
Section titled “One-Line Installation”A single command sets up the repository and installs the plugin:
curl -sSL https://repo.netdefense.io/install.sh | shThe script:
- Installs the repository fingerprint
- Writes the NetDefense repository configuration
- Updates the package database
- Installs the NetDefense plugin
After the script completes, verify the installation:
pkg info os-netdefenseSingle-command install + configure
Section titled “Single-command install + configure”Pass --auto-setup=<token> and the installer drops the registration token, generates a device UUID, provisions an OPNsense API user/key for the agent, and starts the service — all without opening the OPNsense web UI:
curl -sSL https://repo.netdefense.io/install.sh | \ sh -s -- --auto-setup=<your-org-registration-token>The token is the org registration token issued by NetDefense (UUID format). After the script completes, the only remaining step is approving the device in NetDefense — the agent will appear pending immediately.
Output ends with a summary block:
========================================NetDefense Agent Installation Complete========================================
Registration token: APPLIEDDevice UUID:        <uuid>API credentials:    APPLIEDService enabled:    YES (prod channel)
Next step:  Approve this device in NetDefense (it will appear pending).
CI / IaC mode
Section titled “CI / IaC mode”Add --non-interactive to replace the prose summary with a parseable KEY=value block on the last lines of stdout:
curl -sSL https://repo.netdefense.io/install.sh | \ sh -s -- --auto-setup=$NDAGENT_TOKEN --non-interactiveSTATUS=okDEVICE_UUID=<uuid>API_SETUP=okENV=prodThe OPNsense API key/secret are intentionally not emitted to stdout. They live only on the OPNsense box (in /conf/config.xml and the rendered /usr/local/etc/ndagent.conf, both root-readable) and never appear in installer logs, CI consoles, or screenshots. The agent reads them locally — no operator handling required.
Manual Repository Installation
Section titled “Manual Repository Installation”Use this method if you prefer to run each step individually.
-
Install repository fingerprint
Terminal window mkdir -p /usr/local/etc/pkg/fingerprints/netdefense/trustedfetch -o /usr/local/etc/pkg/fingerprints/netdefense/trusted/netdefense \https://repo.netdefense.io/prod/opnsense/fingerprints/netdefense/trusted/netdefense -
Create repository configuration
Terminal window mkdir -p /usr/local/etc/pkg/reposcat << EOF > /usr/local/etc/pkg/repos/netdefense.confNetDefense: {url: "https://repo.netdefense.io/prod/opnsense",priority: 5,enabled: yes,signature_type: "fingerprints",fingerprints: "/usr/local/etc/pkg/fingerprints/netdefense"}EOF -
Update package database
Terminal window pkg update -
Install NetDefense Agent
Terminal window pkg install os-netdefense -
Verify installation
Terminal window pkg info os-netdefense
Offline Package Installation
Section titled “Offline Package Installation”Use this method for air-gapped environments or testing specific versions.
-
Download the package
Download the latest
os-netdefense-*.pkgfile from the NetDefense repository.Terminal window # On your local machinecurl -L -O https://repo.netdefense.io/prod/opnsense/os-netdefense-latest.pkg# Transfer to OPNsense devicescp os-netdefense-latest.pkg root@your-opnsense-ip:/tmp/ -
Install the package on OPNsense
Terminal window ssh root@your-opnsense-ippkg add /tmp/os-netdefense-latest.pkg -
Verify the installation
Terminal window pkg info os-netdefense
Post-Installation Steps
Section titled “Post-Installation Steps”After installing the plugin, you’ll need to configure it before use. The NetDefense plugin will now appear in the OPNsense web interface under Services > NetDefense.
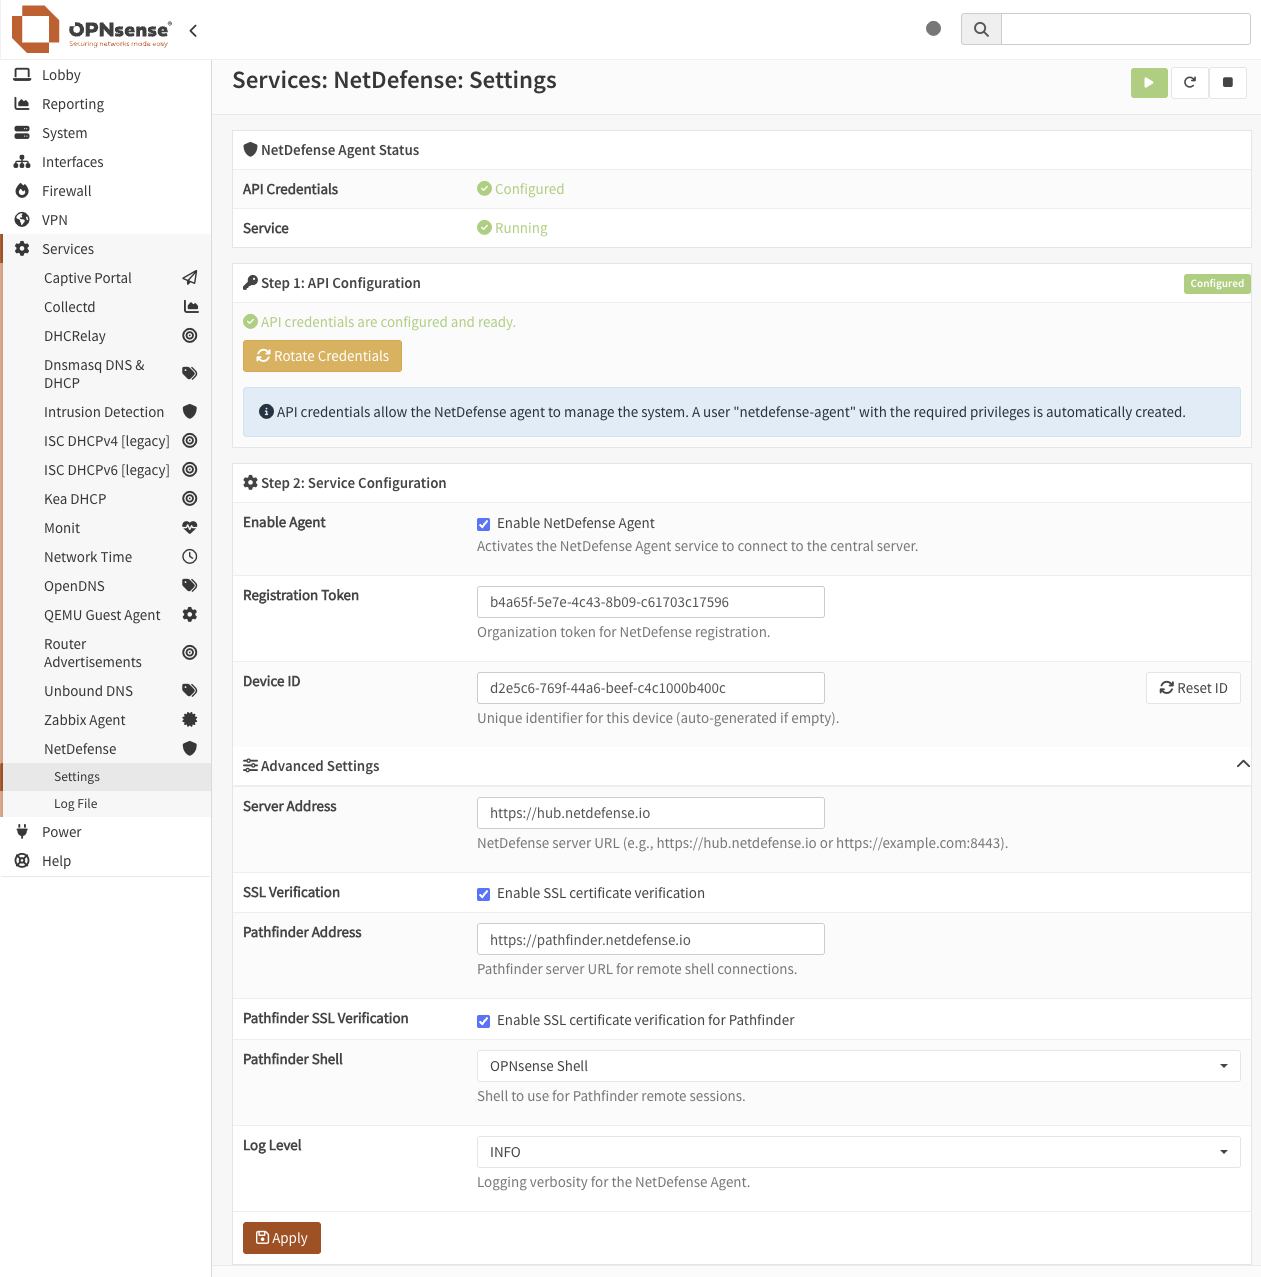
Proceed to the Configuration guide to complete the setup.
Verifying Installation
Section titled “Verifying Installation”To confirm the plugin was installed correctly:
-
Via Web Interface: Navigate to Services > NetDefense — the settings page should load without errors
-
Via Command Line:
Terminal window pkg info os-netdefenseservice ndagent status
Repository Configuration Details
Section titled “Repository Configuration Details”| Parameter | Value | Description |
|---|---|---|
url | https://repo.netdefense.io/prod/opnsense | Repository base URL |
priority | 5 | Repository priority |
enabled | yes | Enable the repository |
signature_type | fingerprints | SHA256 signature verification |
fingerprints | /usr/local/etc/pkg/fingerprints/netdefense | Fingerprint directory |
Security Verification
Section titled “Security Verification”For extra assurance, you can verify the fingerprint from more than one source before installing:
- Repository server: https://repo.netdefense.io/prod/opnsense/fingerprints/netdefense/trusted/netdefense
- Official website: published on netdefense.io